 I’m helping some friends from the film industry set up a free blog on WordPress.com and have discovered stumbling blocks within the WordPress interface that flumoxes non-technical users. In today’s lesson I’ll show you how to “assign your post to a category”. It’s something that every blogger should do and best of all it’s really easy!
In WordPress, these things we call “categories” serve several functions.
Categories quickly inform first-time visitors what the topics are that you, as an author, write about. This is immensely helpful, both for your visitors and for you. Categories, accurately titled and accurately applied to posts (which I occasionally refer to as “articles”), certainly won’t be overlooked by search engines.
The grand convenience of categories is that, thanks to the way that WordPress stores your posts in a database, visitors may elect to view posts which only belong to one category. For instance, you may only want to read the articles that I have published under the “How To” category here on my own website. This rich and powerful means of navigating your data ensures that you’re providing the ultimate convenience to your visitors, and thus to yourself as a content provider.
Find Your Category Listing
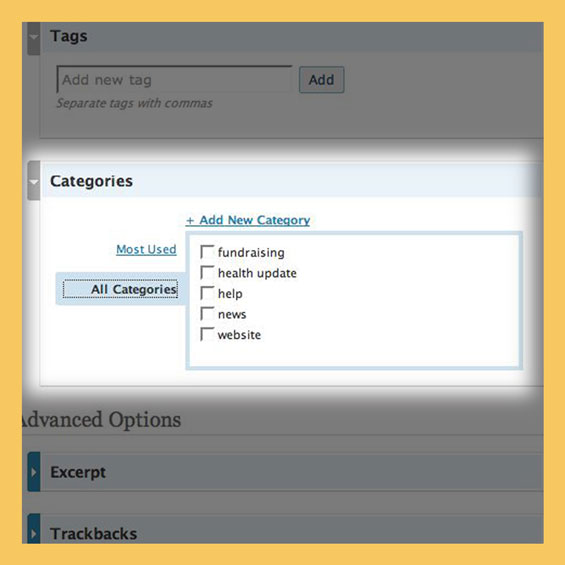
Before you press the “Publish” button on that article you’ve been composing, look around for something called “Categories”. In the newest WordPress.com interface they’re listed underneath the area where you compose your article. Just scroll down past the box where you’ve typed the body of your post and look for a listing of your categories (as shown in the image at the beginning of this post).
See All Your Choices
When you first scroll down to look at the list of categories WordPress may only display the “Most Used” categories. To see ALL of the categories you should click the word link that say “All Categories”. (In the screenshot above you’ll see that I’ve already clicked the “All Categories” link)
Make a Selection
Remember, you must PICK a category to associate with your article before you click the “Publish” button to publish your article. All you need to do is to click the box to the left of the category (which will put a little check mark in the box).
Add a Category
Every new WordPress blog starts off with only one category name: “Uncategorized”. It’s up to you as an Author to create more categories as they’re needed. I’d STRONGLY urge you to use single words as categories, to provide clarity for your visitors. Who can figure out a sentence-long category name? Be concise! (However, as you can see in the provided example above, it is possible to use more than one word in your descriptions.)
Warning: Don’t Forget to Choose a Category!
Please note in this same example that I (as administrator of the blog) have deleted the default category name “Uncategorized”. If you elect to do this, be sure that you (and any other authors on your blog) know that they must select a category from the list of categories before they publish an article, otherwise WordPress will create a new category named “1” and assign it to that uncategorized post, which is obviously not going to be very helpful to your visitors (now is it?).
Multiple Categories
There are times when you might want to list a post under more that one category, and you are able to check more than one category from that list if needed.
I hope that this article helps some of you who don’t understand what categories are, or how they work. Those of us who work with this stuff all the time can lose sight of the fact that some people need a primer on the basics!