Are you having a hard time using Facebook? Are posts by your favorite people being “covered up” by a tidal wave of crap from other friends who post stuff to Facebook every five minutes? Don’t be embarrassed, you’re not alone! Most importantly, don’t get so frustrated that you start unfriending people!! Keep reading to learn how to make custom “channels” on Facebook – from now on you’ll be able to “tune in” to see updates by the people you care about the most! (Trust me, I’ve made television shows!)
Now, before we begin let’s establish what I mean by “channels”….

Cable television is composed of many channels dedicated to (and named after) specific topics of interest. Examples of topic-specific programming include Cartoon Network, CNN, the Food Network and the Science Channel.
It’s human nature to label most all of the people we know with the context in which we normally interact with them; that’s just the way that our brains are wired. This explains why we become so flummoxed when we encounter friends and acquaintances in unfamiliar settings – our brains rely on these people remaining in the place where we originally filed them!
Before we can begin to make Facebook work for you, you’re going to have to invest a few minutes going through your collection of friends and organizing them into groups similar to the manner in which you’ve already organized them in your mind.
Facebook refers to these groups as “Friend Lists”.

Statistics indicate that very few Facebook users ever go to the trouble of creating Lists of their friends, meaning that most people bumble their way around the site, powerless to control what they see. (This means that you’re about to become an “elite” user!)
Making Lists
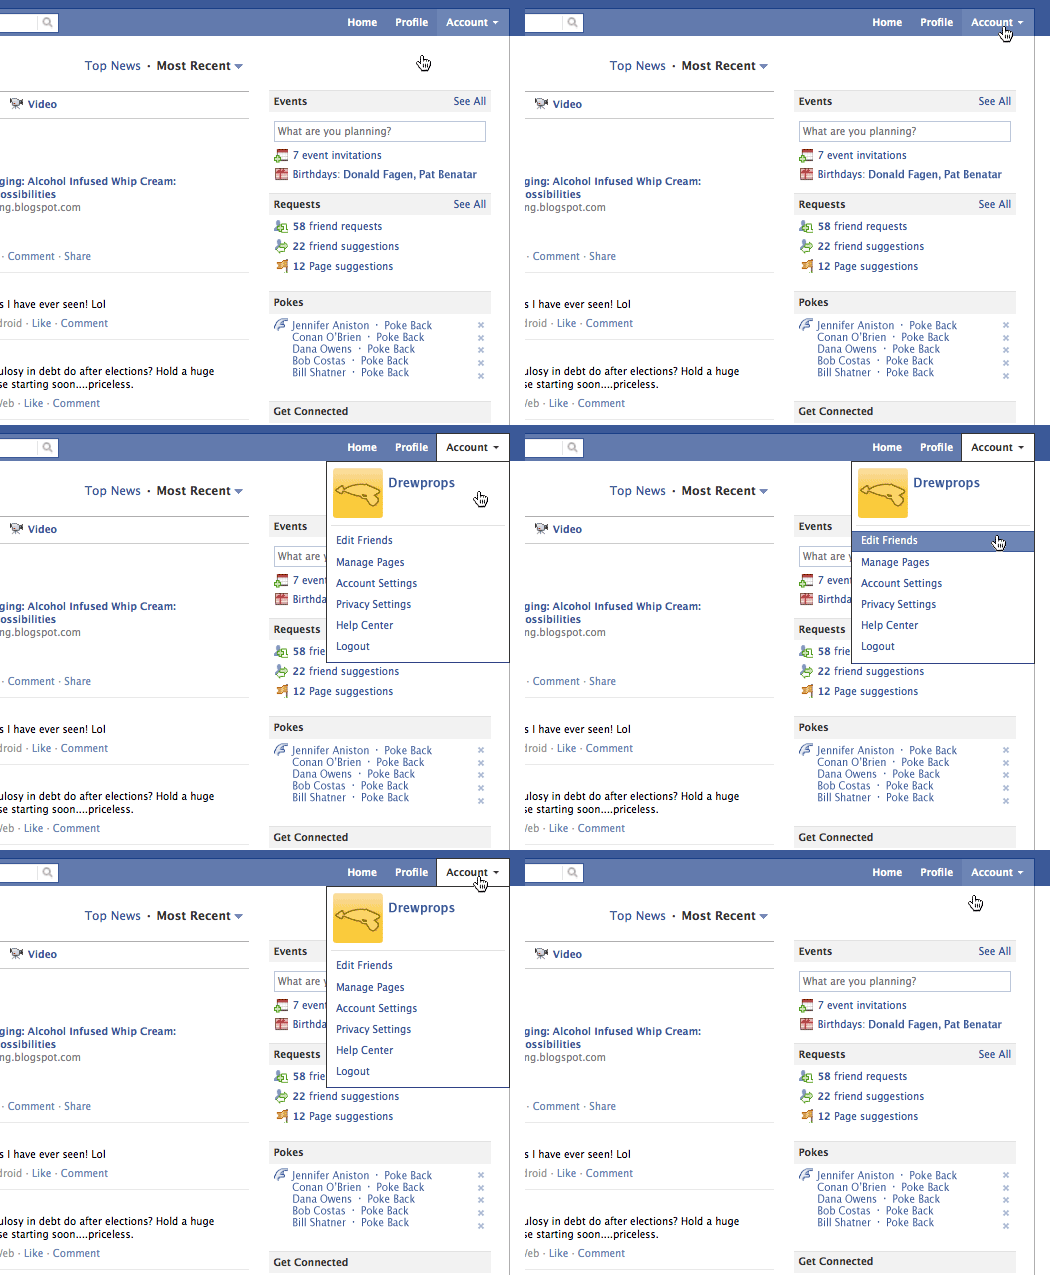
Log into your Facebook account then look for the words “Home”, “Profile” and “Account” in the top right corner of the page (they’re white letters on a blue background). Click on the word “Account” and a list will pop-down. Move your cursor to the option in that list entitled “Edit Friends” and click on that selection.
The screen that comes up next will be the main administration page for your Friends Lists – this is where the magic happens!

If you’ve never build a list of friends it’s really quite easy. I’ve numbered the important areas of this page for you.

- The left hand column contains all of the friends lists that you’ve already created, like playlists in iTunes.
- The middle area displays the contents of any friends list you select in the left hand column. the default view for this area is to show the friends with whom you have most recently interacted.
- The column on the right hand side is for advertisements. This is where Facebook helps you find a busty young woman and buy a log home.
- The “Create a List” button will be important for our next discussion, please note its location.
I’ve been meaning to add a new Friends List… why not follow along with me and make one for yourself?!!
First, we want to click the button marked “+ Create a List”.
A window entitled “Create New List” will pop up and instruct you to “Enter a Name” for this new list.

Select something descriptive of the circle of friends you intend to add to this list. Perhaps it will be “Fishing Buddies” or “My Ex-Wives” or perhaps “The Halitosis Club”. In my case I’ll be making a list called “Bikini Supermodels”.
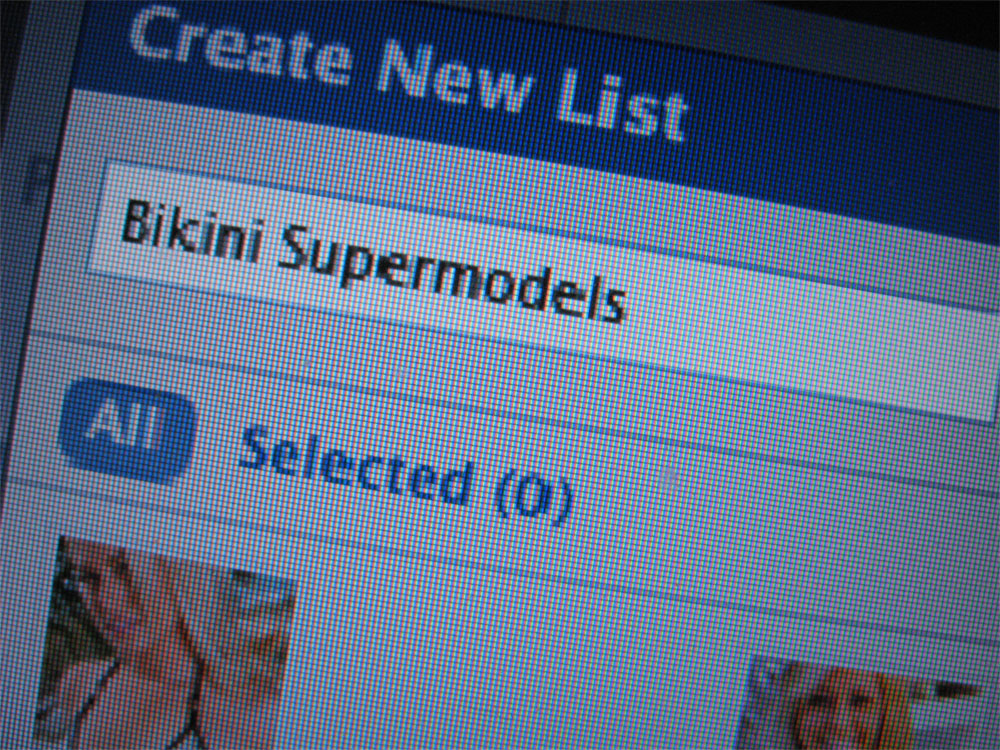
After naming the group you need to scroll down through your list of friends and click on the ones who belong in this group. Once you’ve selected everyone who belongs just click the button “Create List” located at the bottom of the pop-up box. Presto! You’ve made a list!

Note that it’s super easy to assign future friends to existing lists, and best of all: you can assign your friends to multiple lists (for instance after this lesson is complete I intend to go back and add a few of my friends from the ‘Bikini Supermodels’ group to my ‘Poker Night’ group).
Once you’ve organized your friends into lists there are a lot of very powerful things you can do with Facebook. For instance, we can narrow down what we see in our News Feed!! “What’s a News Feed” you ask? Why, that’s just a fancy name for all the posts made by all your friends. The News Feed can display all sorts of things, from status updates and notes, to photographs and videos…. even links to other websites.
To see your newsfeed just click the Facebook logo in the top left hand corner of the page.
There are two ways to view your News Feed. The default view is what Facebook calls “Top News”.
Top News includes posts by your friends which have attracted a lot of attention by other people. If a friend’s status update announces that she’s getting married you can bet that you’ll see that post listed in Top News because there may be dozens of comments made by her friends.
The alternate view (and the one that you should be most interested in understanding) is called “Most Recent”. Go ahead and click that selection to see how Facebook displays a chronological list of comments, links, photos, etc, from ALL your friends, with the most recent additions showing up at the top of the list.
After selecting Most Recent comments you’ll see a small triangle next to the words “Most Recent”. This is called a “disclosure triangle” and indicates that this item does more stuff if you click on it…. so go ahead and click on “Most Recent” one more time! You should be rewarded with a pop-down list which offers you options on what your News Feed will display.
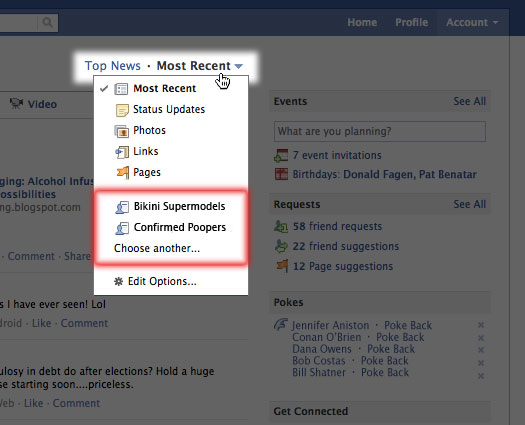
You can now instruct Facebook to show you the “Most Recent” posts by all your friends, the most recent “Status Updates” by all your friends (and nothing else but status updates), the most recent “Photos” by all your friends (and nothing else but photos), the most recent “Links” by all your friends (and nothing else but links) and so on.
But here’s the BEST part… the part that we’ve been building up to over this article: using your new Friends Lists you can now control WHO you see in your News Feed!!! In my case this means that I can click on my Bikini Supermodel Friends List, eliminating the garbage that the rest of my friends are always posting!! Now I can just follow along to what Heidi and Helga and Inga and Kate and all those groovy supermodel girls are always posting….. ::sigh:: it’s mostly Farmville…
But Wait, There’s More!
Do you see that little thing at the bottom marked “Options”? Click it to reveal a very important control panel!!
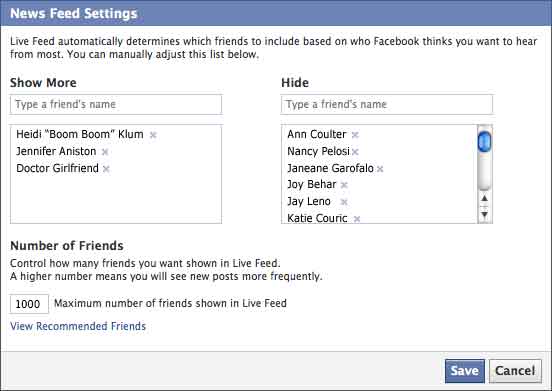
This dialogue box provides way to block specific people permanently! Eliminate the embarrassing social faux pas of unfriending someone who annoys you by simply hiding everything they post! Preserve the illusion of friendship whilst totally turning off those people who push all your buttons!
Or perhaps there are people whose posts delight you beyond belief? Fulfill your stalker appetite by telling Facebook to make sure and show you every little thing these people post! If you’ve made a Friends List with your most favorite people on it you can just type in the name of that List here and everyone in that List will be given Superstar treatment on your News Feed!
But Wait, There’s Even More!
In addition to being able to control whose updates you see in your News Feed you can also use your Friends Lists to control who sees your posts. I might cover that in another post if you, the people of the Internet, demand it.
Parting Advice
Anyone under the age of 30 was born knowing how to do everything described in this article, so don’t get too cocky about your new-found skillz, honcho. Now get out there and enjoy Facebook with newfound gusto!
Happy Facebooking and Goodnight!
I like read and see events